

Garden Beds Raised Bed Gardening: Transform Your Growing Space This Season
Raised bed gardening transforms ordinary garden beds into productive, manageable growing spaces that put you in complete control of your soil, drainage, and plant health. If you’ve ever wrestled with compacted clay, poor drainage, or backbreaking weeding sessions at ground level, building garden beds above grade changes everything.
The beauty of raised bed gardening lies in its flexibility. You can construct garden beds from cedar, composite materials, or galvanized steel, filling them with premium soil mixes that warm faster in spring and drain perfectly after summer storms. In 2026, we’re seeing a surge in modular raised bed kits that snap together without tools, alongside DIY enthusiasts building custom beds from reclaimed materials that add character to their yards.
Garden beds raised 12 to 24 inches off the ground practically eliminate back strain while extending your growing season by two to three weeks on either end. The contained space makes crop rotation simple, companion planting intuitive, and pest management far more effective than traditional in-ground plots.
Whether you’re working with a compact urban patio or a sprawling suburban yard, raised bed gardening scales to fit your space and ambition. Start with a single 4×8 bed this season, and you’ll likely add more next year. The initial investment in materials pays dividends through years of improved yields, reduced maintenance, and the simple joy of growing food in soil you’ve built yourself. Plus, let’s be honest, there’s something deeply satisfying about creating geometric garden beds that look as good as they produce.

Why Garden Beds Are the Secret to Raised Bed Gardening Success
Ever wonder why some gardeners look impossibly serene while others resemble mud-wrestling champions after a weekend in the garden? The secret isn’t a fancy spa treatment. It’s raised garden beds, and the difference they make is nothing short of dramatic.
Garden beds transform the entire raised bed gardening experience by giving you control over what matters most: your soil. In traditional ground-level plots, you’re stuck with whatever clay, sand, or mystery composition your property offers. With raised beds, you create the perfect growing environment from scratch. Think of it as meal prep for plants. You’re building the exact nutrient profile your tomatoes crave, without negotiating with compacted subsoil that drains like a parking lot.
Drainage improvements alone convert soggy disaster zones into productive growing spaces. Raised beds lift your plants above problem areas, allowing excess water to escape instead of drowning your zucchini’s dreams. The flip side works too: in dry climates, you retain moisture more efficiently than ground-level rows that bake in the sun.
Then there’s the pest situation. Raised garden beds create a physical barrier that slugs, certain ground-dwelling insects, and wandering neighborhood rabbits find surprisingly discouraging. It’s not a fortress, but it’s definitely an obstacle course. Add some copper tape around the edges, and you’ve basically installed a bouncer at the door.
The ergonomic benefits deserve their own fan club. Bending over traditional gardens turns weeding into an Olympic sport nobody signed up for. Raised beds, especially those built at comfortable heights, let you garden without auditioning for a chiropractor’s testimonial. Your back will thank you, probably in writing.
Extended growing seasons sweeten the deal further. Raised soil warms faster in spring, giving you a head start on planting. In fall, that elevated position helps you squeeze out a few extra weeks before frost wins.
Choosing the Right Garden Bed Materials for Your Space
Metal Garden Beds: The Modern Choice
Metal’s having a moment in garden design, and it’s not just because it photographs beautifully for your Instagram feed (though it absolutely does). Modular metal raised beds have surged in popularity this year, and for good reason: they’ll outlive your compost pile, your gardening gloves, and possibly your mortgage.
The sleek, contemporary look of metal beds fits beautifully into modern landscapes while delivering serious durability. Unlike wood that rots or splits, quality metal beds can last 20-plus years with minimal maintenance. Galvanized steel and corten options resist rust while developing character over time. The clean lines work equally well flanking a minimalist patio or nestled into a cottage garden that needs some structural backbone.
Price-wise, 2026 has brought some welcome options. Vego Garden’s Jumbo Modular kit now sits at $175.46, down from the regular $289.95, making the leap to metal more accessible. Birdies Garden Products has restocked their popular modular systems, giving you choices that won’t require a second mortgage.
The modular aspect deserves special mention. These kits snap together without requiring engineering expertise or a weekend lost to hardware store runs. You can start with one bed and expand your setup as your ambitions (and vegetable consumption) grow. Plus, if you move, they disassemble and travel with you. Try doing that with a wood bed you built into the ground with sweat equity and possibly tears.
Metal beds heat up slightly faster in spring, extending your growing season at both ends. That’s extra weeks of fresh salads, which makes the investment taste even better.
Wood and Natural Materials: The Classic Approach
Wood remains the go-to choice for gardeners who crave that timeless, cottage-garden aesthetic. Cedar and redwood naturally resist rot without chemical treatments, making them safe for edibles and kind to the planet. They’ll last 10-15 years and age into a gorgeous silvery patina that looks like it belongs in a storybook.
Pine and fir cost less but need attention to treatment. Untreated pine breaks down in 3-5 years, which some environmentally-conscious gardeners actually prefer since it composts back into the earth. If you choose treated lumber, stick with newer ACQ or copper azole treatments rather than older CCA formulations.
The charm factor is undeniable. Wood blends into natural landscapes, feels warm under your hands during construction, and gives you endless DIY customization options. You can stain it, leave it raw, or let your kids paint sunflowers on the sides. It’s forgiving for beginners who might measure twice and cut once-ish. Plus, wooden beds pair beautifully with gravel paths and climbing roses, creating that English garden vibe that metal just can’t match.
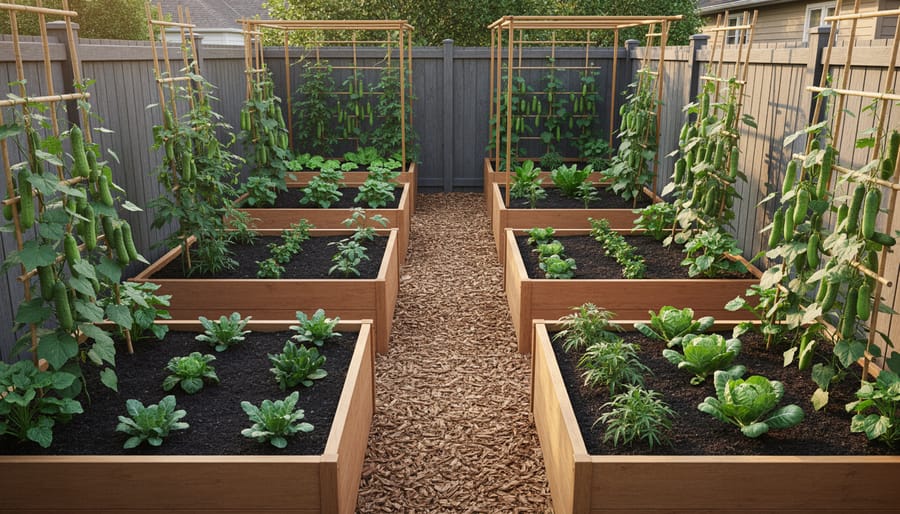
Designing Your Garden Beds Layout for Maximum Harvest
Your layout can make or break your harvest, regardless of how fancy your soil mix is. Start with the ideal raised bed heights between 6 and 12 inches for most vegetables, though deeper beds up to 24 inches work brilliantly for root crops like carrots and parsnips. Taller beds also save your back, which your future self will thank you for when you’re weeding in July heat.
Width matters more than most gardeners realize. Stick with the recommended 3-4 foot width so you can reach the center from either side without doing gymnastic stretches that end with you face-planting in your tomatoes. Length is flexible, though 8 to 12 feet keeps things manageable without feeling like a marathon every time you harvest.
Pathway spacing deserves serious thought. Allow at least 2 feet between beds for comfortable access, or bump it to 3 feet if you plan to use a wheelbarrow. These aren’t wasted spaces, they’re your sanity corridors. Mulch them, gravel them, or plant clover for living pathways that add charm and keep mud off your boots.
For maximizing productivity in smaller spaces, consider adopting square foot gardening principles within your raised beds. This method divides beds into 1-foot squares, letting you plant intensively while maintaining organization. It’s particularly brilliant for beginners who tend to overcrowd (we’ve all been there).
Orientation affects your harvest too. Run beds north to south when possible so plants receive even sunlight throughout the day. If your yard slopes, position beds perpendicular to the slope to prevent water from racing downhill and leaving half your plants thirsty. Add artistic flair with staggered heights, curved pathways, or a central bed surrounded by smaller satellites. Function doesn’t have to look boring, and a garden that makes you smile is one you’ll actually maintain.
Building Your Raised Garden Beds: DIY Steps That Actually Work
Building your garden beds doesn’t require a contractor’s license or a trust fund. Whether you’re working with a modular kit or cutting your own lumber, the construction process boils down to six straightforward steps that’ll have you planting within a weekend.
Start by choosing your location wisely. Mark the footprint with stakes and string, then stand back and imagine yourself reaching into the bed from all sides. Can you access the center without doing yoga poses you haven’t attempted since college? Good. That’s your spot. Consider sun exposure, water access, and whether you’ll be cursing that tree root six months from now.
- Choose your location and mark the footprint with stakes and string, ensuring you can reach the center comfortably from all sides
- Level the ground and remove grass or weeds; for established lawns, proper lawn removal prep prevents persistent weeds from invading your bed later
- Assemble your frame according to kit instructions or your design, checking corners with a carpenter’s square for clean 90-degree angles
- Line the bottom with hardware cloth if gophers or moles are an issue in your area, or use cardboard for a simple weed barrier that breaks down over time
- Fill with your prepared soil mix in layers, watering lightly as you go to eliminate air pockets
- Water thoroughly and let the bed settle for a day or two before planting, topping off any sunken areas
For modular metal kits, assembly is genuinely simple. Most snap or bolt together without requiring power tools. The panels interlock, you add the corner posts, and suddenly you’ve built something that looks intentional. Wood beds require more measuring and screwing, but the process is equally forgiving. Pre-drill your holes to prevent splitting, and don’t stress about perfection. Your tomatoes won’t judge slightly wonky corners.
The leveling step matters more than most beginners realize. A tilted bed drains unevenly and looks drunk. Use a long board and a level, shimming low spots with soil rather than wrestling the frame. If your yard slopes significantly, consider terracing multiple beds instead of fighting gravity with a single monster structure.
Bottom liners serve different purposes depending on your nemesis. Hardware cloth stops burrowing pests. Landscape fabric blocks weeds but also blocks beneficial organisms, so skip it unless you’re dealing with nightmare-level invasive roots. Cardboard or several layers of newspaper work beautifully as a temporary barrier that eventually feeds your soil as it decomposes.
Fill day is satisfying but surprisingly exhausting. Bags of soil are heavy, and you’ll need more than you think. A standard four-by-eight bed that’s twelve inches deep requires roughly thirty-two cubic feet of soil. That’s a lot of schlepping. Recruit a friend with the promise of future tomatoes.
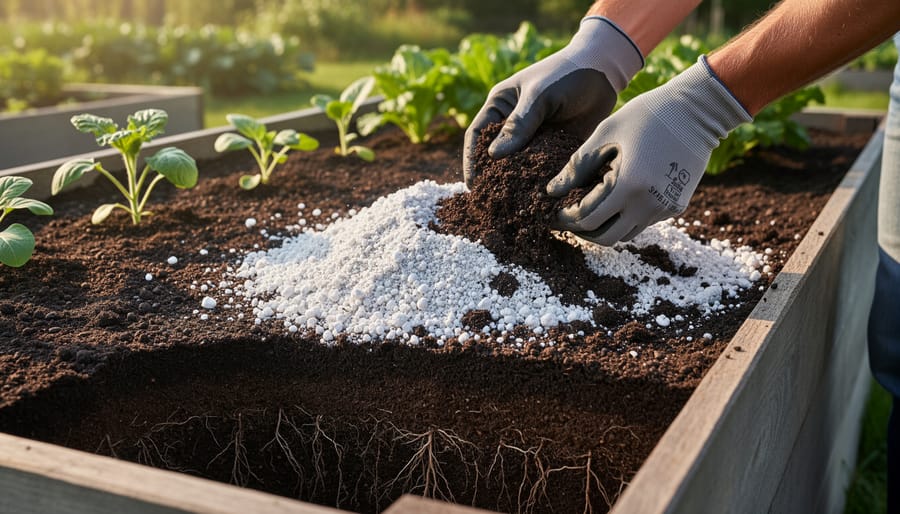
Filling Garden Beds: The Soil Recipe for Success
Your beautiful raised bed is built, level, and ready. Now comes the moment that separates thriving harvests from sad, wilted attempts: filling it with the right soil mix. Ground soil won’t cut it here. Raised beds need a custom blend that drains well, holds moisture, and feeds your plants all season long.
Start with the classic raised bed formula: one-third compost, one-third topsoil, and one-third moisture-retaining material like coconut coir or peat moss. This combination gives you drainage, structure, and fertility in one swoop. If you’re building multiple beds in 2026, buy in bulk from local suppliers to save money and reduce packaging waste. Many garden centers now offer loose soil delivery, which beats hauling dozens of plastic bags.
Compost is your secret weapon. It feeds beneficial microbes, improves texture, and provides slow-release nutrients. Make your own from kitchen scraps and yard waste, or source it from a municipal composting program. Store-bought compost works too, just check that it’s been properly aged and doesn’t smell like ammonia.
For the moisture-retaining component, coconut coir has become the environmentally friendlier choice over peat moss. Peat bogs take centuries to form, while coir is a renewable byproduct of coconut processing. Either way, this ingredient keeps your soil from drying out too quickly during summer heat.
Layer your soil as you fill: add a few inches, water it lightly, then repeat. This settles everything naturally and eliminates air pockets that can cause uneven settling later. Top off your bed to about two inches below the rim, leaving space for mulch and preventing soil from washing out during heavy rain.
Want to supercharge your mix? Add a handful of worm castings per square foot or mix in a balanced organic fertilizer. Your plants will thank you with explosive growth.
Growing in Garden Beds: What to Plant and When
Now that your raised beds are built and filled, it’s time for the fun part: deciding who gets to live in your freshly minted garden real estate. Think of it as matchmaking, but with vegetables.
Start your 2026 growing season with cool-season crops in early spring. Lettuce, spinach, peas, and radishes laugh in the face of light frost and give you a harvest before the heat arrives. As soil warms to 60°F and beyond, transition to warm-season lovers like tomatoes, peppers, cucumbers, and beans. The beauty of raised beds is that your soil warms up faster than ground-level plots, giving you a two-week head start on your neighbors.
Succession planting keeps your beds productive all season long. Plant a new row of lettuce or radishes every two weeks, and you’ll have a continuous harvest instead of a glut followed by a famine. When early crops finish, tuck in something new. That’s prime real estate you’re sitting on.
The best crops for raised bed gardening thrive in the controlled environment you’ve created:
- Leafy greens (lettuce, spinach, kale) for quick harvests and succession planting
- Root vegetables (carrots, beets, radishes) that love loose, deep soil
- Herbs (basil, cilantro, parsley) tucked into corners and edges
- Compact tomatoes and peppers that won’t overwhelm the space
- Fast-maturing crops like radishes and baby lettuce for continuous production
Companion planting works magic in close quarters. Basil next to tomatoes isn’t just folklore, it genuinely helps repel aphids. Marigolds mixed with your cottage garden plants add pest protection with personality. Plant tall crops on the north side so they don’t shade shorter neighbors, and build a garden arbor for cucumbers and beans to climb vertically, maximizing your growing space while keeping the ground free for lettuce and herbs below.
Match plant personalities to your own. If you’re forgetful, skip fussy crops and stick with drought-tolerant herbs and established perennials. If you love daily garden check-ins, grow temperamental tomatoes that reward attention with flavor bombs.
Maintaining Your Raised Garden Beds Through the Seasons
Keeping your garden beds thriving means treating them as living systems, not just containers you fill once and forget. Water deeply but less often to encourage strong root growth, aim for an inch per week, adjusting for rainfall and your climate. Mulch the surface with two to three inches of straw, shredded leaves, or grass clippings to lock in moisture and cut your watering chores nearly in half while keeping weeds at bay.
Feed your raised beds with compost twice yearly, in spring and fall, to replace nutrients your plants devour throughout the growing season. A thin layer raked into the top few inches works wonders without complicated fertilizer schedules. Rotate plant families each season to prevent soil-borne diseases and nutrient imbalances, where tomatoes grew this year, plant beans or lettuce next spring.
Your soil will settle a few inches in the first year as organic matter decomposes. Top it off with fresh compost rather than letting the level drop, which stresses plant roots and wastes your bed’s vertical space. Check corner joints and fasteners each autumn for loosening or rust, tightening what needs it before winter weather makes minor issues worse.
As temperatures drop, protect tender crops with row covers or explore DIY greenhouse tips to extend your harvest into colder months. Pull spent plants promptly to prevent pest overwintering, and spread a thick layer of mulch or even cardboard over empty beds to suppress weeds until spring. Your raised beds will reward seasonal attention with years of abundant harvests and healthy, balanced soil that just keeps getting better.
Learning More: Raised Bed Gardening Workshops and Community Resources
Reading books and blogs only gets you so far. There comes a point when you need to get dirt under your fingernails alongside people who actually know what they’re doing. Local gardening workshops offer hands-on learning that transforms raised bed gardening from theory into confidence, especially when you can ask questions about your specific yard challenges and see techniques demonstrated in real soil.
Events like this workshop let you see established raised beds in action, touch different materials, and learn from experienced gardeners who’ve already made the mistakes you’re about to make. You’ll discover which soil amendments actually work in your region, get honest feedback about local pest challenges, and probably swap plant starts with fellow attendees. Community gardens often maintain demonstration beds specifically for teaching purposes, showing you what three-year-old cedar looks like versus new metal, how different mulching techniques perform, and which companion planting combinations thrive in your climate zone.
Beyond formal workshops, connect with your area’s master gardener programs, local agricultural extension offices, and community garden networks. These groups typically host seasonal events, maintain online forums where you can post photos of mysterious plant problems, and sometimes offer mentorship programs pairing beginners with experienced growers. The knowledge you’ll gain from someone who’s been gardening in your exact microclimate for twenty years beats generic internet advice every time.
You’ve made it through the planning, the building, and now you’re looking at your very own raised garden beds ready to burst with life. That’s the real magic of garden beds in raised bed gardening: they turn anyone, whether you’re working with a postage stamp patio or a sprawling backyard, into a confident grower. You control the soil, sidestep the backaches, and watch those tomatoes laugh in the face of slugs.
This isn’t just about better vegetables. It’s about reconnecting with the earth in a way that’s creative, sustainable, and genuinely fun. Every garden bed you fill is a small rebellion against factory farming and a tiny victory for pollinators. Plus, let’s be honest, there’s something deeply satisfying about eating a salad you grew in a box you built with your own hands.
So grab those seeds, channel your inner garden artist, and get building. Your future self, standing knee-deep in zucchini you didn’t even want this many of, will thank you. The dirt’s waiting.
