
Gardening Stones That Transform Your Yard (Without Spending a Fortune)
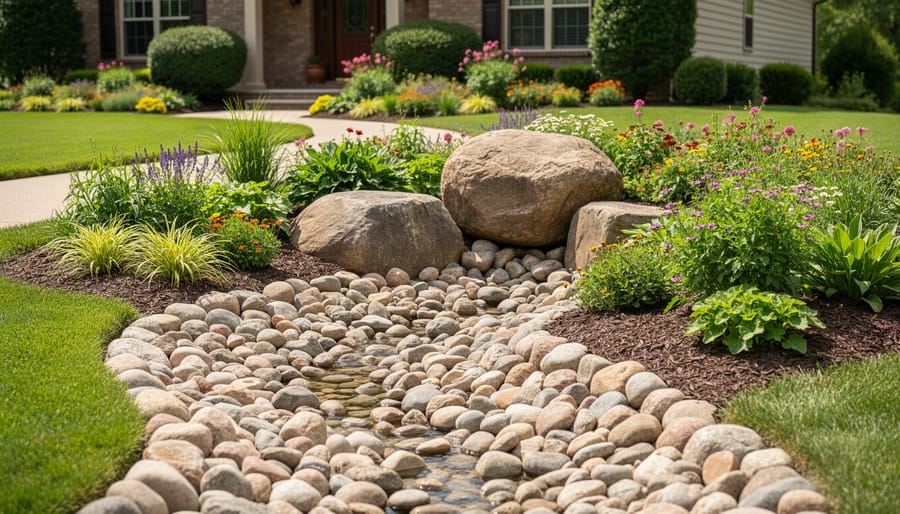
Gardening stones transform outdoor spaces through dual roles: they solve practical problems like drainage and weed suppression while creating stunning visual focal points that add texture, structure, and personality to any landscape. Whether you’re layering river rocks as low-maintenance mulch, building a dry creek bed for water management, or arranging boulders into a meditative Zen garden, stones offer permanence and versatility that few other materials can match.
The beauty of stone gardening lies in its accessibility. You don’t need a massive budget or professional landscaping experience to make an impact. A wheelbarrow of pea gravel turns a muddy pathway into a clean walking surface. A few strategically placed stepping stones carved from reclaimed concrete slabs become a charming garden trail. Even a simple ring of fieldstones elevates a flower bed from ordinary to intentional.
Stones also align perfectly with sustainable gardening practices. Unlike wood mulch that decomposes and needs constant replacement, stone groundcover lasts decades with zero maintenance. Permeable gravel surfaces allow rainwater to filter naturally into soil rather than rushing into storm drains. And if you’re creative about sourcing (think construction site leftovers, creek beds, or that pile of rocks your neighbor is desperate to offload), your hardscape materials might cost you nothing but a little sweat equity and a sincere thank-you.
Why Stones Are Having a Gardening Moment Right Now
Stones have quietly become the MVP of modern garden design, and it’s not hard to see why. Scroll through any gardening forum or Pinterest board and you’ll spot the trend: river rocks lining walkways, decorative pebbles replacing traditional mulch, and boulder arrangements that look like they belong in a sculpture garden. What’s driving this shift isn’t just aesthetics, it’s a perfect storm of practical benefits that appeal to both your wallet and your environmental conscience.
The low-maintenance aspect alone has converted plenty of skeptics. Unlike plants that demand constant attention or wood chips that decompose faster than your New Year’s resolutions, stones basically sit there looking good indefinitely. No watering, no fertilizing, no panicked replacement trips to the garden center when things go south. For time-strapped gardeners who’d rather enjoy their outdoor space than constantly maintain it, that’s a game-changer.
The sustainability angle hits even harder in our current climate-conscious era. Water restrictions are becoming the norm rather than the exception in many regions, and stones offer a brilliant workaround. They reduce the need for irrigation-dependent grass, prevent soil erosion during heavy rains, and never require pesticides or treatments. Plus, they’re reusable and repurposable, try that with annual mulch.
Consider what stones bring to your garden:
- Zero water requirements while helping conserve moisture in surrounding soil
- Decades-long durability without decomposition or replacement costs
- Adaptability to any design style from minimalist modern to cottage rustic
- One-time investment that pays dividends for years
The creative DIY movement has also fueled this trend, with gardeners discovering that stones are like LEGO for adults. They stack, arrange, paint, and transform into anything from functional pathways to whimsical fairy gardens. This versatility means your stone project can grow and change with your skills and vision, making it perfect for beginners and experienced landscapers alike.
The Surprising Ways Stones Can Transform Your Garden
Practical Stone Solutions That Actually Work
Stones solve real garden problems, and they do it without weekly watering or seasonal replanting. Whether you’re battling mud puddles, fighting weeds, or trying to create walkable spaces, the right rocks can handle it.
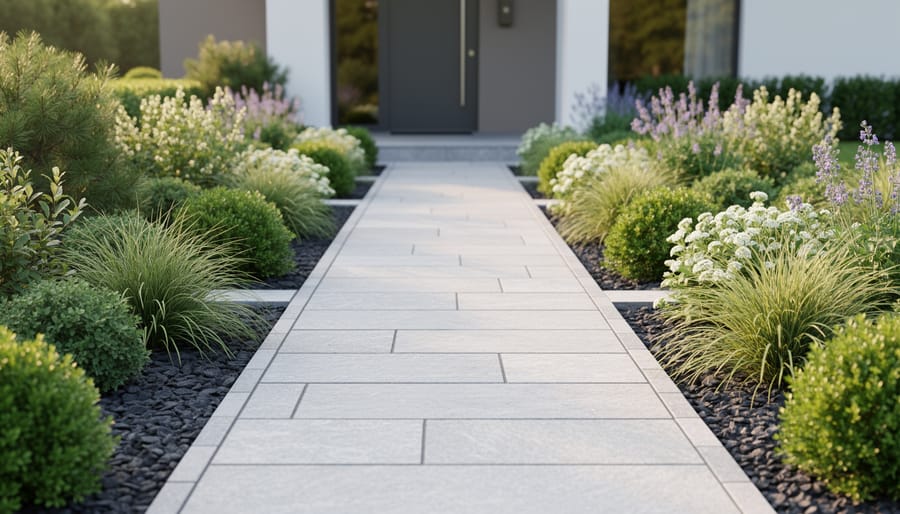
Pathways are where most gardeners start, and for good reason. Larger flagstones or stepping stones create natural walking routes that look intentional while protecting your lawn from worn patches. For informal paths, pea gravel offers a satisfying crunch underfoot and costs a fraction of pavers. The key is matching stone size to traffic: save the delicate crushed granite for light-use areas and reserve chunkier river rock for high-traffic zones.
Drainage problems disappear when you work with stone instead of against it. A dry creek bed made from river rock channels water away from problem spots while looking like you hired a landscape designer. For areas that stay perpetually soggy, a layer of larger stones under soil creates air pockets that prevent root rot. If you’re exploring desert garden ideas stones become essential for managing the little rain you do get.
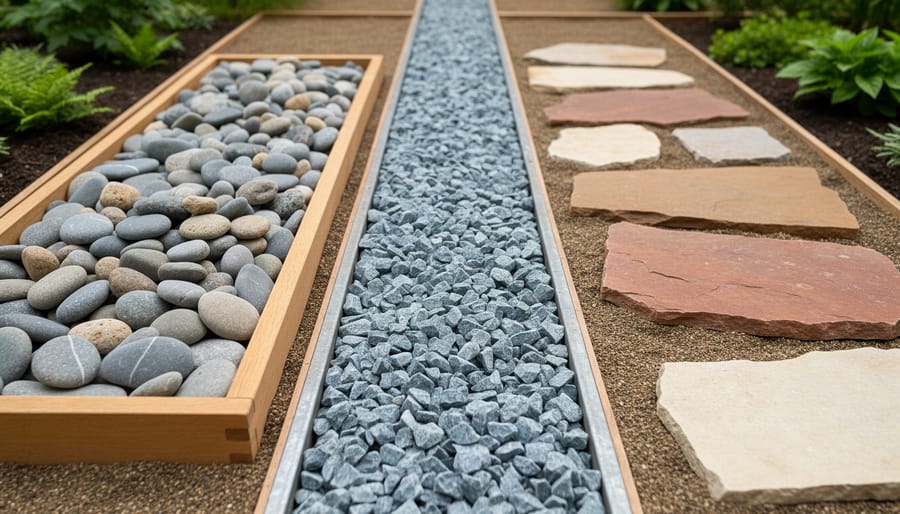
- River Rock
- Smooth, rounded stones ranging from 1-6 inches, perfect for drainage beds and dry creek features where water flow is a concern.
- Pea Gravel
- Small, rounded stones about pea-sized that work beautifully for pathways, around plant bases, and as affordable ground cover.
- Crushed Granite
- Angular, decomposed stone that compacts well for stable paths and provides excellent drainage while deterring slugs.
- Flagstone
- Flat, irregular slabs ideal for formal stepping stone paths and patio surfaces where a polished look matters.
Stone mulch alternatives actually outperform wood chips in certain situations. A two-inch layer of small stones around perennials keeps soil temperatures stable, reflects heat to sun-loving plants, and never needs replacing. Unlike organic mulch, rocks won’t blow away in storms or decompose into nothing by next spring. When paired with landscape fabric suppresses weeds effectively underneath, stone mulch becomes nearly maintenance-free.
For erosion control on slopes, larger angular stones interlock naturally to hold soil in place during heavy rain. Stack them terraced-style for both function and visual interest. The rocks absorb heat during the day and release it at night, extending your growing season for heat-loving plants positioned nearby. It’s passive solar gardening without the complicated setup.
Decorative Stone Projects That Wow (Without the Wow Budget)
The best part about decorative stone projects? You can create stunning garden focal points with materials that cost next to nothing. While your neighbors are dropping serious cash on elaborate landscaping, you’ll be crafting eye-catching features from stones you found on a Saturday morning walk.
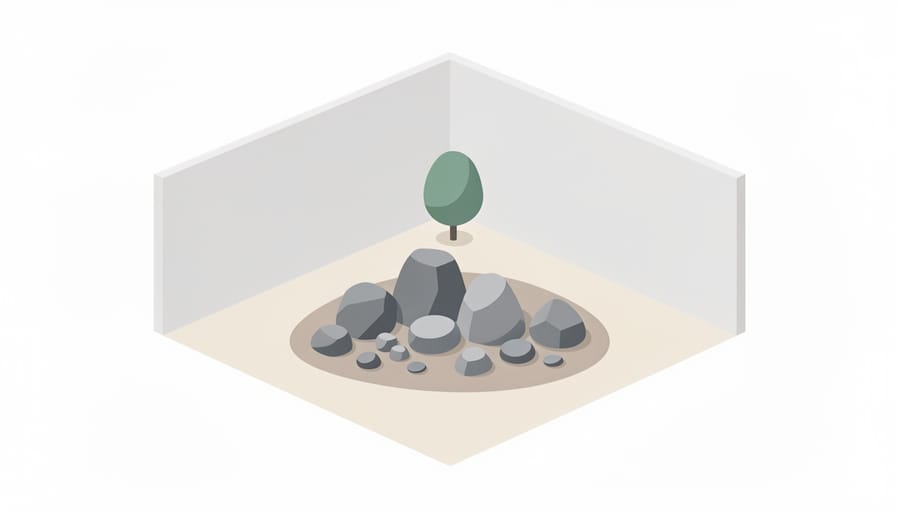
Rock gardens top the list for visual impact with minimal investment. Layer different-sized stones to create natural-looking elevations, tucking drought-tolerant plants like sedums and sempervivums between the rocks. The key is arranging stones as if nature placed them there, not like you’re building a pyramid. Cluster three or five larger stones as anchors, then fill gaps with smaller pieces for a cohesive look.
Painted stone markers inject personality into your garden beds without looking like you raided a craft store. Skip the cutesy mushrooms and paint simple, bold numbers or vegetable names in a consistent style. Use outdoor acrylic paint and seal with marine varnish so your “Tomatoes” marker doesn’t become “Toma” by August. Position these along pathways or at bed edges where they’ll catch attention.
Stone borders define garden spaces beautifully when you match the scale to your plants. Smaller stones work for herb gardens and delicate perennials, while chunky river rocks suit bold plantings like hostas or ornamental grasses. Partially bury the stones so they look established rather than scattered on top like someone tipped over a wheelbarrow.
Fairy gardens appeal to the young and young-at-heart. Create miniature landscapes using flat stones as tiny patios, stacked pebbles as walls, and smooth rocks as benches. Add moss between stones for that enchanted forest vibe. The charm comes from attention to scale, not expensive accessories.
For sculptural elements, stack flat stones into cairns or balance rounded rocks into organic towers. These meditative pieces add vertical interest and cost exactly zero dollars if you’ve got a decent stone collection. They’re also forgiving, you can rebuild them whenever inspiration strikes or cats knock them over.
How to Source Stones Without Spending a Fortune
Finding stones for your garden shouldn’t require a second mortgage. The best rock hunting starts right under your nose, literally. Walk your property first. That pile of stones at the edge of your yard? Garden gold. Check areas where previous owners might have dumped rocks during landscaping projects, near old fences, or along property lines.
Construction sites are treasure troves if you ask politely. Builders often have leftover stone or gravel they’re happy to offload rather than pay disposal fees. Swing by with a truck and your best smile. Same goes for landscaping companies, they sometimes have reject stones that don’t match client specifications but work perfectly for home projects.
Online marketplaces have transformed rock hunting into a digital sport. Search for “free rocks,” “landscaping stone,” or “clean fill” on local buy-nothing groups and classified sites. People demolishing patios or redoing walkways frequently give away perfectly good stones. One person’s yard waste is your zen garden border.
Creek beds and beaches can yield beautiful smooth stones, but check local regulations first. Many areas prohibit removal from natural waterways. When it’s allowed, collect thoughtfully and sparingly.
Stone yards sell remnants and odd lots at deep discounts. These mismatched pieces, wrong size for commercial jobs, discontinued colors, cost a fraction of full-priced stone and add character to residential gardens. Ask specifically about their discard pile.
Farm auctions, estate sales, and demolition sites offer unexpected sources. That crumbling stone wall on an old property? Someone might pay you to haul it away. Your garden benefits, they save removal costs, and you’ve got enough weathered stone for three projects.
The rock hunting life means your car always has suspicious scratches and your friends know better than to compliment your garden stones unless they want a two-hour sourcing story.
Getting Started: Your First Stone Garden Project
Ready to get your hands dirty (and a little rocky)? Let’s start with a beginner-friendly project that delivers impressive results without overwhelming complexity. A simple stone border or pathway makes an ideal first project because it’s forgiving, doesn’t require specialized tools, and lets you see immediate transformation.
Before you haul a single stone, walk your planned area at different times of day. Notice where water pools after rain, which spots get trampled most, and how sunlight shifts. This reconnaissance saves you from creating a muddy pathway or a border that blocks your best view. Sketch your design on paper or mark it with garden hose to visualize the final look.
Here’s your step-by-step blueprint:
- Clear the area of grass, weeds, and debris, removing at least 3-4 inches of soil for pathways or 2 inches for borders. These fundamental site prep steps prevent future headaches with shifting stones.
- Install landscape fabric to suppress weeds while allowing drainage. Overlap edges by 6 inches and secure with landscape staples every 2 feet.
- Add a 2-inch base layer of crushed gravel or sand, then rake it level. This creates stability and proper drainage.
- Arrange your stones before setting them permanently. Play with spacing, orientation, and color distribution until it feels right, this is where your artistic eye shines.
- Press each stone firmly into the base layer, wiggling slightly to settle it. Larger stones need deeper embedding for stability.
- Fill gaps between stones with fine gravel, decomposed granite, or creeping ground covers like thyme for a softer look.
The key difference between a pathway and a border? Pathways need flatter, uniform stones for comfortable walking, while borders can embrace irregular shapes and varied heights. If you’re edging existing raised bed gardening areas, stack smaller stones to create definition without blocking access.
Start small. A 10-foot border or 6-foot pathway teaches you the fundamentals without committing your entire weekend. You’ll quickly discover your preferred stone sizes and develop an eye for natural-looking arrangements. Most importantly, you’ll prove to yourself that creating something beautiful from simple stones is absolutely within your reach.
Common Stone Gardening Mistakes (And How to Dodge Them)
Even experienced gardeners sometimes turn their stone projects into cautionary tales. The most common blunder? Skipping drainage planning entirely and wondering why your beautiful stone pathway becomes a miniature pond every time it rains. Always slope pathways slightly away from structures and leave gaps between stones for water to escape, your future self will thank you.
Size matters more than you’d think. Those adorable pebbles you bought in bulk might look charming in the bag, but they’ll migrate everywhere and disappear into mulch within weeks. For pathways, stick with stones at least two to three inches in diameter. For borders, go bigger. Conversely, massive boulders can overwhelm small space gardening areas faster than you can say “landscaping regret.”
Landscape fabric deserves respect. Yes, it’s tedious to install, but neglecting this step means you’ll spend years battling weeds that sprout gleefully between your stones. Lay quality fabric before placing stones, overlap seams by several inches, and secure it properly.
Color coordination separates thoughtful designs from random rock piles. That shocking pink granite might seem fun until it clashes with your brick house for the next decade. Choose stones that complement your home’s exterior and existing landscape palette, neutral tones rarely disappoint.
Finally, resist overcomplicating your design. A simple curved border outperforms an intricate mosaic pattern you’ll never finish.
Keeping Your Stone Garden Looking Fresh Year After Year
The best part about stone gardens? They practically maintain themselves. Unlike your herb bed that’s plotting its weekly rebellion, stones just sit there looking good. But a little occasional attention keeps them looking intentional rather than “abandoned since the Bronze Age.”
Give your stones a proper spray-down with the garden hose twice a year. Spring removes winter grime and algae spores before they take hold, while autumn clears fallen leaves and organic debris that trap moisture. For stubborn dirt on decorative pieces, a stiff brush and plain water work wonders without introducing chemicals that might leach into your soil.
Weeds will attempt diplomacy, poking through even the best-laid stone arrangements. Pull them young, while their roots are shallow and weak. A quick five-minute patrol every few weeks beats an hour-long weed wrestling match later. If you skipped landscape fabric during installation, consider tucking it under stones in problem areas now.
Moss and algae add character to shaded pathways but create slippery hazards on walking surfaces. For safety zones, scrub with a solution of one part white vinegar to three parts water. Let stubborn patches sit for fifteen minutes before brushing. In decorative areas where moss looks charming, leave it be.
Refresh your arrangements seasonally by rotating statement stones to different positions or swapping in new finds from your rock hunting adventures. Move smaller accent pieces around planters as your garden evolves. Stone gardens grow with you, just slower and with significantly less watering drama.
Your garden is about to get a whole lot more interesting, and your wallet’s about to breathe a sigh of relief. Whether you’re creating a practical pathway that’ll outlast your mortgage or painting stones to surprise your neighbors, you’re tapping into something that’s both ancient and incredibly current. Stones offer the rare gardening win-win: they’re sustainable, virtually maintenance-free, and endlessly creative.
The best part? You don’t need to be an expert landscaper or have a trust fund. Start small with a single project that excites you. Maybe it’s a simple border that defines your flower bed, or perhaps it’s turning those rocks you’ve been tripping over into a charming rock garden. Each stone you place is a little act of creativity that’ll stick around for years.
So grab a bucket, channel your inner rock collector, and get started. Your garden’s transformation doesn’t require perfection, just enthusiasm and a willingness to get your hands dirty. Those stones aren’t going to arrange themselves, and frankly, where’s the fun in that?
