
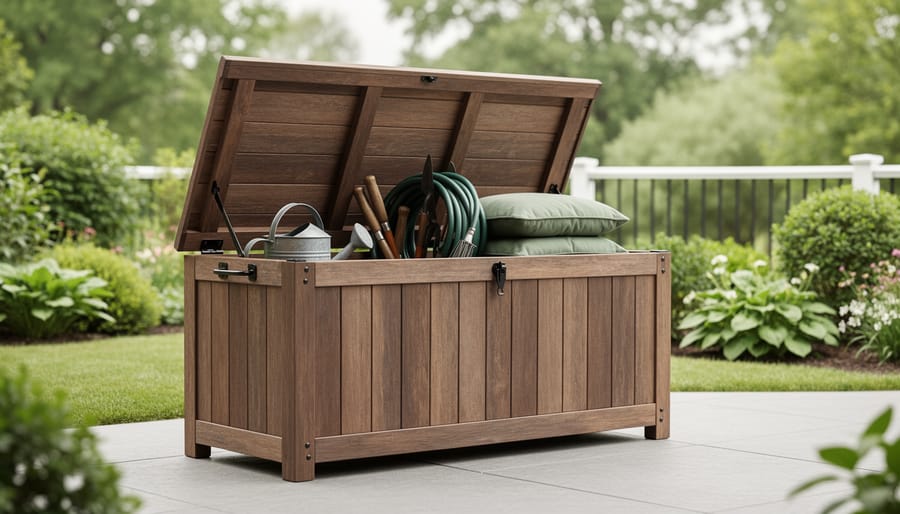
How to Build an Outdoor Storage Bench in 6 Simple Steps
You can build a functional outdoor storage bench in a weekend using basic carpentry skills, standard lumber, and tools you probably already own. This project combines seating with weather-resistant storage for garden supplies, pool toys, or outdoor cushions, and costs roughly $75-150 in materials depending on wood choice and finish. The construction follows a simple box-frame design with a hinged lid, requiring no complex joinery or specialty equipment.
An outdoor storage bench solves one of the garden’s most annoying problems: where to stash the stuff that clutters your patio without sacrificing seating space or hauling everything back to the garage. Unlike plastic bins that crack in sun and fade to that sad chalky finish by August, a well-built wooden bench ages gracefully and actually looks better as it weathers. Plus, there’s something deeply satisfying about sitting on furniture you made with your own hands while sipping morning coffee, even if you did accidentally drill through the wrong board twice and may have invented some new curse words in the process.
This guide walks you through every step, from selecting rot-resistant lumber to adding drainage holes that keep your stored items dry instead of marinating in surprise rainwater. Whether you’re a confident DIYer or someone whose previous carpentry experience peaks at assembling flat-pack furniture with an Allen wrench and mild panic, these instructions break down the build into manageable stages that won’t leave you stranded halfway through with a pile of expensive lumber and regret.
Why Your Garden Needs a Storage Bench (Beyond Just Hiding the Chaos)
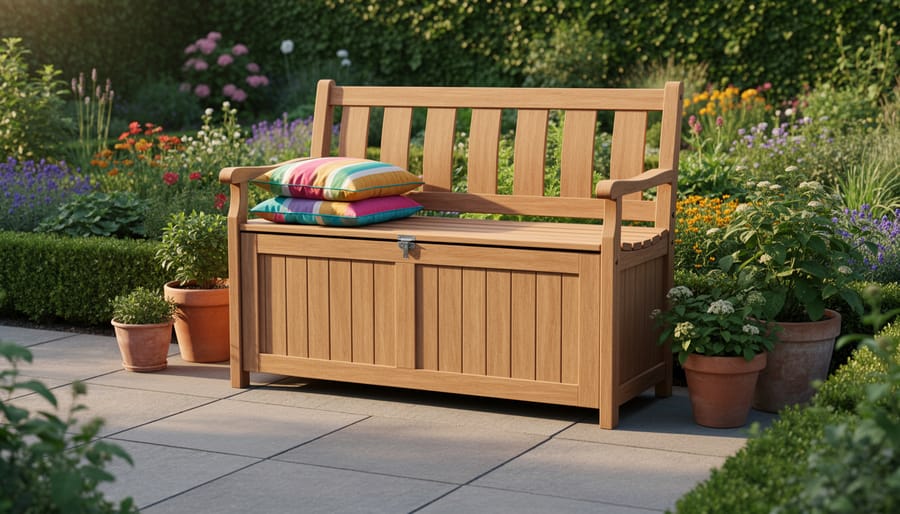
Let’s be honest: garden sheds overflow, patios collect random piles of stuff, and cushions migrate mysteriously from chairs to muddy corners. A storage bench solves this chaos with surprising elegance. You get a designated home for patio cushions that won’t mildew, gardening stakes and hand tools within easy reach, and a place to tuck away pool toys, toddler gardening supplies, and those kids’ gardening sets that otherwise scatter across the lawn.
Beyond organization, you’re adding valuable seating that doesn’t require dragging chairs from the garage. When you build with reclaimed or sustainably-sourced wood, you’re giving materials a second life while reducing waste. The bench itself protects your belongings from rain, sun, and snow, extending the lifespan of expensive cushions and tools that would otherwise deteriorate outdoors. It becomes an anchor point that grounds your garden design, transforming what was once a cluttered corner into an intentional, welcoming spot. Plus, there’s something deeply satisfying about opening a lid to reveal neatly stored supplies instead of the usual yard pandemonium.
Choosing Your Design and Materials
Best Wood and Material Options for Outdoor Use
Cedar and redwood are the gold standard for outdoor projects, and for good reason. Both naturally resist rot, insects, and moisture without chemical treatment. Cedar is typically more budget-friendly and widely available, while redwood offers slightly superior durability and that gorgeous rich color that ages to a silvery gray. Either option will give you a bench that lasts 20-30 years with minimal maintenance, and both are sustainably harvested from managed forests.
Here’s how the most popular options stack up:
- Cedar: Naturally rot-resistant, lightweight, easy to work with, moderate cost, and sustainably sourced from North American forests
- Redwood: Extremely durable, beautiful grain, excellent weather resistance, higher cost, and typically harvested from certified sustainable sources
- Pressure-treated pine: Very affordable, chemically protected against rot and insects, heavier than cedar, and requires careful handling during cutting
- Composite decking: Zero maintenance, won’t rot or splinter, made from recycled materials, but costs more and requires different fastening techniques
Pressure-treated pine is the economical workhorse. It’s treated with preservatives that make it weather-resistant and insect-proof, though it needs a year to dry before you can stain it properly. Just wear gloves and a mask when cutting, and you’re good to go.
For the eco-conscious builder, reclaimed wood and upcycled pallets deserve consideration. Old barn wood brings character and history, while pallets offer free material that’s already weathered life’s storms. Just inspect carefully for rot, nails, and stability. Your bench might wobble with stories to tell, but that’s half the charm.
Size and Storage Capacity Planning
Before you cut a single board, grab a tape measure and think about what’s actually going home in this bench. Are you hiding a few cushions and a trowel, or are you storing an entire arsenal of pool noodles, beach toys, and that inflatable flamingo you swore you’d use more than once?
Start by measuring your available space. A small bench (3-4 feet) works perfectly for apartment balconies or cozy patios, holding lightweight items like gardening gloves, small tools, and plant markers. Medium benches (4-5 feet) are the sweet spot for most yards, accommodating bulkier items like hoses, watering cans, and sports equipment. Large benches (6+ feet) can swallow everything from pool supplies to outdoor games.
For comfortable seating, aim for 16-18 inches in height, that’s the standard chair height your knees will thank you for. Depth should be 18-24 inches: enough to sit without feeling perched, while maximizing storage inside. Sketch your items to scale or stack them physically to visualize the interior capacity you’ll need. Pro tip: add two inches to your mental estimate because garden stuff multiplies mysteriously over winter.
What You’ll Need: Tools and Materials
Before you start sawing and screwing, let’s make sure you’re armed with everything you need. Nothing derails a Saturday project faster than three trips to the hardware store because you forgot the level. Here’s what you’ll need to build a standard 4-foot outdoor storage bench:
Essential Tools:
- Circular saw or miter saw (for cutting wood to length)
- Power drill/driver with bits (for pre-drilling and driving screws)
- Measuring tape (25-foot minimum)
- Carpenter’s square or speed square (ensuring those right angles are actually right)
- Level (keeping your bench from becoming a lopsided disaster)
- Pencil (for marking cuts, fancy carpenter’s pencils earn you bonus points)
- Clamps (at least two, for holding pieces while you work)
- Safety glasses and hearing protection (because you only get one set of eyes and ears)
- Sanding block or orbital sander (for smoothing rough edges)
Materials and Approximate Quantities:
- Cedar or pressure-treated lumber: eight 1×6 boards at 4 feet, four 2×2 boards at 16 inches (for frame legs)
- Exterior wood screws: 2.5-inch (1 pound box) and 1.5-inch (half-pound box)
- Heavy-duty outdoor hinges: one pair, 3-4 inches
- Weather-resistant wood stain or sealant: one quart
- Sandpaper: 80-grit and 120-grit sheets
- Wood glue (exterior-grade, optional but recommended for extra strength)
Don’t have a circular saw gathering dust in your garage? Most home improvement stores rent tools by the day for reasonable rates, and your neighbor with the suspiciously well-equipped workshop might lend you what you need in exchange for admiring photos of the finished bench. Keep your gardening apron handy for holding screws and your pencil while you work.
Safety First: What to Know Before You Start
Before you pick up that saw, let’s talk about keeping all your fingers attached to your hands, because a storage bench isn’t worth a trip to the emergency room. This project involves power tools, heavy lumber, and chemical finishes, so a few sensible precautions will keep your DIY adventure fun instead of frightening.
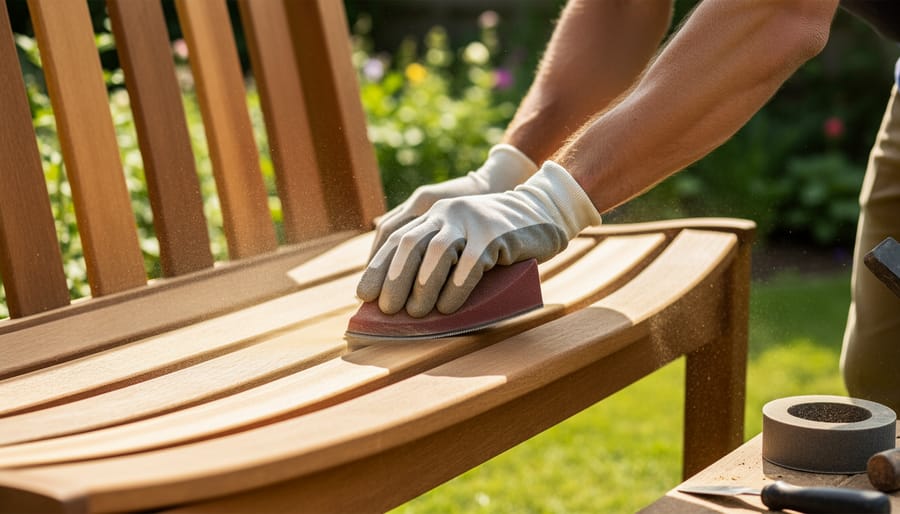
Always wear safety glasses when cutting, drilling, or sanding. Wood chips have a magical ability to find your eyes at the worst possible moment. If you’re using loud power tools like circular saws or routers, pop in some ear protection too. Your future self will thank you for preserving your hearing.
Set up your workspace on a stable, level surface with good lighting. Wobbly sawhorses or dim corners lead to wonky cuts and dangerous slips. When applying stains or sealants, work outdoors or in a well-ventilated area, those fumes aren’t doing your brain cells any favors.
Lift heavy boards with your legs, not your back, and don’t hesitate to ask for help with unwieldy pieces. There’s no prize for attempting solo heroics with an eight-foot plank. Keep your work area tidy as you go, because tripping over scrap wood while holding a power drill is nobody’s idea of a good time.
Step-by-Step: Building Your Outdoor Storage Bench
Step 1: Cut All Your Pieces (The Measure-Twice Stage)
Grab your cutting list and a good pencil, this is where precision pays off. For a standard 4-foot bench, you’ll need:
Frame pieces: Four 2x4s cut to 45 inches (long sides) and four cut to 15 inches (short ends). Floor: Five 1×6 boards at 45 inches. Sides and back: Two side panels (1x12s) at 18 inches tall by 16 inches deep, plus one back panel at 45 inches wide by 18 inches tall. Front: One 1×12 at 45 inches. Lid: Five 1×6 boards at 48 inches, plus two support battens (1x2s) at 14 inches.
Mark each cut line clearly with a carpenter’s square, trust me, eyeballing leads to wonky benches. Cut one board at a time and label pieces with painter’s tape as you go. Work methodically through your list rather than batch-cutting everything at once, which lets you verify measurements before moving forward.
Keep bandages handy. Splinters consider themselves an essential part of the woodworking experience.
Step 2: Assemble the Frame and Floor
Start with the base frame by connecting your front, back, and side pieces into a rectangle. Lay them flat and drill pilot holes before driving 3-inch exterior screws through the corners, two screws per joint works well. Here’s the game-changer: measure both diagonals. If they’re equal, your frame is perfectly square. If not, gently rack the frame until the measurements match.
Once squared, flip the frame and attach your floor boards across the supports, leaving about 1/4-inch gaps between each board. These drainage gaps prevent water from pooling and turning your storage bench into an accidental terrarium. Pre-drill every screw hole to avoid splitting the wood, especially near board ends. Use 2-inch screws for the floor, keeping them flush with the surface.
Step 3: Attach the Sides and Back
With your base frame solid and square, it’s time to stand this bench up, literally. Position your first side panel flush against the bottom frame, ensuring it sits evenly on the floor piece. Clamp it in place before drilling pilot holes and driving screws through the panel into the frame. Work your way around, attaching the second side panel, then the back. Here’s the crucial bit: grab your level and check each panel before final fastening. A wonky side now means a wonky bench forever. If something’s off, loosen the screws, adjust, and re-check. Take your time here, the frame won’t judge you for being picky.
Step 4: Build and Install the Lid
The lid is where function meets comfort, so take your time getting it right. Lay your lid planks side by side across the top opening, leaving small gaps (about 1/8 inch) between boards for expansion. Measure to ensure they overhang evenly on all sides, usually about half an inch past the frame for a clean look.
Flip the assembled lid upside down and attach support battens across the underside, about 4-6 inches from each end. These battens prevent warping and give you solid mounting points for your hinges. Use screws long enough to bite into the planks without poking through.
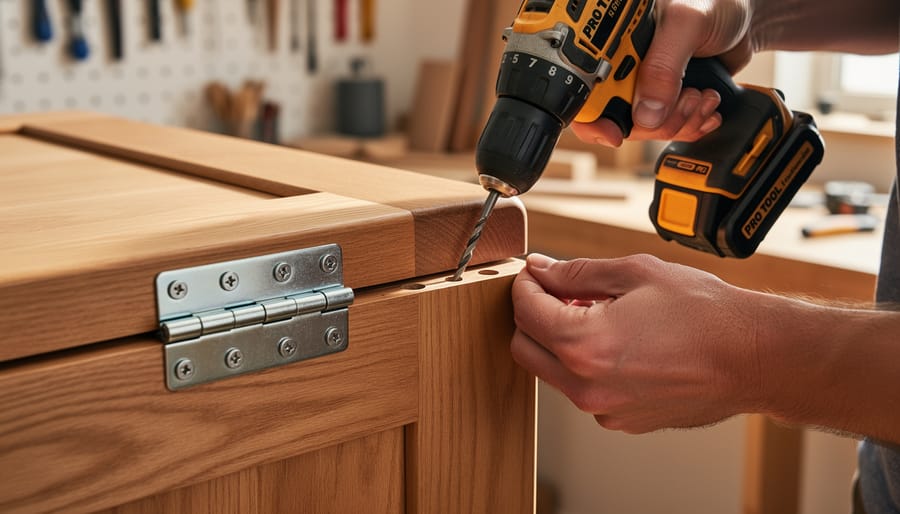
Position your heavy-duty outdoor hinges along the back edge, spacing them evenly if using two or three. Mark your holes carefully, pre-drill, then fasten the hinges to both the lid and the bench frame. Open and close the lid several times, it should move smoothly without binding. If it catches, loosen the screws slightly and adjust until the motion feels natural. For households with curious kids or unpredictable breezes, soft-close hinges or safety stays are worth the small investment to prevent pinched fingers or sudden slams.
Step 5: Add Ventilation and Finishing Touches
With your bench nearly complete, it’s time for those crucial final details that separate a rough woodworking project from furniture you’ll actually want to sit on.
Start by drilling three to five quarter-inch ventilation holes in the bottom of your bench, spacing them evenly. These prevent moisture buildup that leads to musty smells and wood rot. Position them toward the back where they won’t be visible from the front.
Now comes the therapeutic part: sanding everything smooth. Use 120-grit sandpaper on all surfaces, then switch to 180-grit for the seat top and any edges you’ll touch regularly. Pay special attention to corners and the front lip of the lid, nothing ruins a peaceful garden moment like a splinter ambush.
Consider adding feet (small blocks or rubber pads) underneath each corner to lift the bench slightly off the ground. This improves drainage and prevents direct ground contact that accelerates wood decay. Simple decorative trim along the front edge or rope handles on the sides add character while making your bench easier to move when needed.
Step 6: Apply Weather Protection and Seal
Your bench is built, but it won’t last long without protection. Outdoor wood faces constant assault from sun, rain, and temperature swings, so applying a quality weather-resistant finish is essential.
You have three main options. Clear sealant preserves the natural wood grain while providing water resistance, ideal for cedar or redwood. Exterior stain adds color while letting wood texture show through, perfect if you want that rustic look. Exterior paint offers the most protection and color choices, though it hides the wood grain entirely.
For application, work in a well-ventilated area on a dry day above 50°F. Use a quality brush or foam applicator, applying thin, even coats along the wood grain. Don’t glob it on, multiple thin coats beat one thick, drippy layer every time.
Most finishes need two to three coats, with 4-6 hours drying time between applications. Let the final coat cure for 24-48 hours before exposing it to weather or sitting on it.
For eco-conscious builders, look for low-VOC or water-based finishes. They’re better for the environment and your lungs, without sacrificing protection.
Testing Your Bench and Making Adjustments
Before you haul your new bench into its permanent spot, run through these quick checks to make sure everything works as it should.
Start with the lid. Open and close it a few times, paying attention to any sticking points or squeaky hinges. A little lubricant often fixes minor binding. Press down gently on the seat from different positions, it shouldn’t flex or creak excessively.
Check stability by giving the bench a firm shake from each side. If it wobbles, tighten any loose screws and verify it’s sitting flat on level ground. Run your hand along all edges and surfaces, feeling for splinters or rough spots that need another pass with sandpaper.
Test the weight capacity gradually. Start by sitting on it yourself, then add weight incrementally if you plan to store heavy items inside. Most well-built benches handle several hundred pounds easily, but better to confirm now than discover limits the hard way.
Touch the finish to ensure it’s completely dry and cured according to the product instructions. If everything checks out and the bench feels solid, congratulations, you’ve officially built functional outdoor furniture. Time to fill it with all those garden supplies that have been cluttering your porch.
Creative Customization Ideas
Now that your bench is built, it’s time to make it uniquely yours. Here are some favorite ways to transform a basic storage bench into a statement piece:
- Add a plush outdoor cushion in a vibrant color or pattern that complements your garden’s palette
- Paint or stencil the exterior with botanical motifs, geometric designs, or a weathered finish that matches your garden archway or other structures
- Install interior dividers using thin plywood to create compartments for seed packets, hand tools, and small supplies
- Attach a hinged trellis panel to the back for climbing jasmine, clematis, or morning glories
- Build small planter boxes into the sides or ends for herbs, trailing flowers, or succulents
- Add decorative metal corner brackets or vintage drawer pulls for character
For a cohesive look, match your bench’s finish to existing garden features or create intentional contrast. A dark-stained bench pops against light-colored fencing, while a painted white bench brings cottage charm to herb gardens. Consider the bench’s surroundings too, if it sits near your vegetable patch, mount small tool hooks on the sides for trowels and pruners. Near a patio, add solar-powered accent lighting underneath for evening ambiance. The best customizations solve real problems while looking good, so think about how you’ll actually use the space before diving into decorative additions.
Maintenance Tips to Keep Your Bench Looking Great
You didn’t build this beauty just to watch it fall apart in two seasons. A little regular TLC goes a long way toward keeping your outdoor storage bench functional and attractive for years.
Set a calendar reminder to reapply your protective finish every one to two years, depending on your climate and sun exposure. Before you do, wipe down the entire bench and check all screws and hinges, tighten any that have loosened over time. While you’re at it, poke a stick through those drainage holes to clear out any accumulated leaves or debris. Nothing ruins wood faster than standing water.
Inspect for early signs of damage like small cracks, splintering, or soft spots. Catching these early means a quick sand and touch-up instead of major repairs later. If you live somewhere with brutal winters or scorching summers, consider bringing cushions inside and covering the bench during the worst weather. Your future self will thank you.
When it’s time to dispose of old stains or sealants, take them to a household hazardous waste facility rather than dumping them down the drain. Your garden, and the local watershed, deserves that respect.
Common Questions About Building Storage Benches
You’ve just walked through the entire build process, but a few practical questions probably popped up along the way. Here are the answers to what most first-time bench builders wonder about.
Is this project really beginner-friendly?
Yes, if you can measure, cut, and drill, you can build this bench. The design uses straightforward joinery, no fancy angles or complex joints, making it perfect for your first outdoor woodworking project.
How much will materials cost?
Expect to spend between $75 and $200 depending on your wood choice and bench size. Pressure-treated pine runs cheapest, while cedar or composite materials push toward the higher end.
Should I use wood glue along with screws?
For outdoor furniture, screws alone work fine since you want the option to disassemble or repair later. Glue creates permanent bonds that make future adjustments nearly impossible, and moisture cycles can compromise the adhesive anyway.
How long does the build actually take?
Plan on 4 to 6 hours for cutting, assembly, and sanding, plus additional drying time between finish coats. Most people spread this across a weekend, build on Saturday, finish on Sunday.
What if my lid doesn’t close evenly?
Check that your frame is square and level first. If one side hangs lower, you likely need to adjust the hinge placement or add shims under the low corner of the bench itself.
Do I need to bring the bench inside during winter?
Not if you’ve used weather-resistant wood and applied proper finish. Just clear out any standing water or debris, and your bench will handle winter just fine outdoors.
The wonky lid question comes up constantly, and nine times out of ten, it’s a level issue with the base rather than the lid itself. Set a carpenter’s level across the top of your frame before attaching the lid, and you’ll save yourself the frustration of troubleshooting later. If you did end up with a slightly twisted frame, strategically placed shims under the bench feet work wonders for evening things out.
Cost concerns are valid, especially when you’re trying to decide between wood types. Remember that spending more upfront on cedar or composite materials means less maintenance hassle and longer lifespan. That cheaper pressure-treated pine might save you fifty bucks today, but you’ll be reapplying finish more often and possibly replacing boards sooner. Consider it an investment in future weekend mornings you won’t spend re-staining.
Congratulations! You’ve just added “outdoor furniture builder” to your skill set, and your garden is about to get a whole lot more organized. There’s something deeply satisfying about sitting on a bench you built with your own hands, knowing that underneath you’re hiding the garden hose, miscellaneous pruning shears, and those mysterious bags of potting soil you bought on impulse last spring.
Your new storage bench isn’t just furniture, it’s proof that you can tackle projects that seemed intimidating at first. Every time you open that lid, you’ll remember the weekend you spent measuring, cutting, and probably muttering at stubborn screws. And honestly? That’s the best kind of garden accessory.
We’d love to see how your bench turned out! Share your photos, your favorite customizations, or the hilarious mishaps along the way. Your trowels, watering cans, and pool toys finally have a proper home instead of staging a daily obstacle course near your back door. Now that you’ve conquered this project, who knows what you’ll build next? Your garden’s just getting started.
