
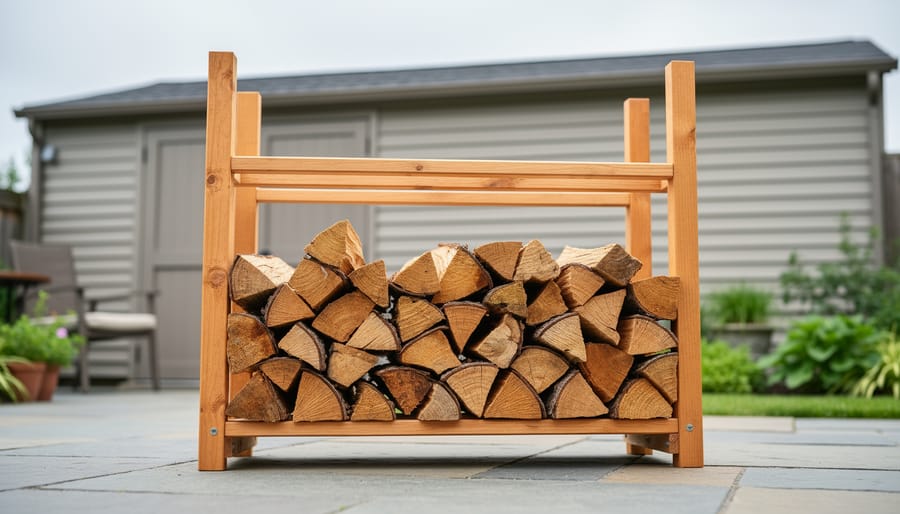
How to Build a DIY Outdoor Firewood Rack (Simple Weekend Project)
You can build a sturdy outdoor firewood rack in about four hours using basic lumber and less than $50 in materials, creating a practical storage solution that keeps your firewood dry, organized, and ready for cozy winter fires. This straightforward weekend project requires only a saw, drill, and measuring tape, tools most DIYers already own, and the finished rack will hold a full face cord while letting air circulate to season your wood properly.
Picture this: no more hauling armloads of logs from that sad tarp-covered heap behind the shed, no more bark fragments trailing through your kitchen, and definitely no more wondering if your firewood is actually dry enough to burn without smoking out the entire neighborhood. A well-designed outdoor firewood rack solves all these problems while adding a surprisingly appealing rustic touch to your yard or patio.
The beauty of building your own rack lies in customization. Store-bought options run $100 to $300 and rarely fit your exact space or wood volume needs. When you DIY, you control the dimensions, adjust the height for comfortable loading, and even add a roof overhang if your storage spot gets hammered by weather. Plus, there’s genuine satisfaction in stacking your first logs on something you built with your own hands, especially when guests compliment your handiwork while warming themselves by your fire.
Why Your Firewood Deserves a Home (And Your Back Does Too)
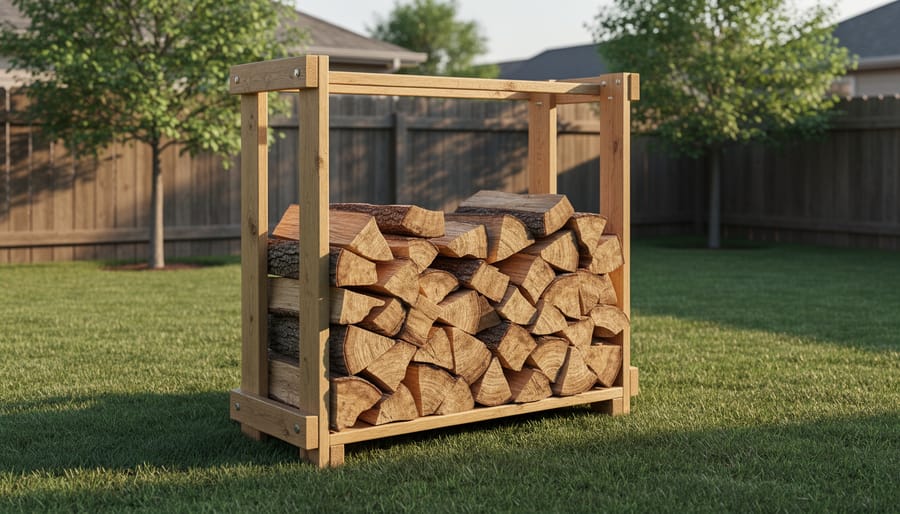
Tossing your firewood in a heap on the ground might seem fine until you’re fishing soggy logs out of a mud puddle at six o’clock on a freezing evening. Your firewood deserves better than that indignity, and honestly, so does your back.
A proper firewood rack elevates your wood off the damp ground, allowing air to circulate around each piece. This keeps the logs dry and seasoned, which means they’ll light faster and burn hotter when you need them. Wet wood doesn’t just frustrate you with smoke and sputtering flames, it also releases more creosote and pollutants into the air. Properly dried firewood burns cleaner, making your cozy fire a bit friendlier to the environment too.
Beyond the practical perks, there’s the matter of your spine. Bending repeatedly to grab logs from ground level is a one-way ticket to lower back complaints. A raised rack puts your firewood at a comfortable height, turning wood retrieval into a civilized activity rather than an archaeological dig.
Let’s not forget aesthetics and order. A well-built firewood rack adds rustic charm to your outdoor space, turning what was once a chaotic pile into an intentional design element. It corrals the clutter, keeps critters from nesting in your fuel supply, and prevents wood from rotting into the soil. Your garden looks tidier, your firewood stays in prime condition, and you get to feel rather accomplished about the whole arrangement.
What You’ll Need to Get Started
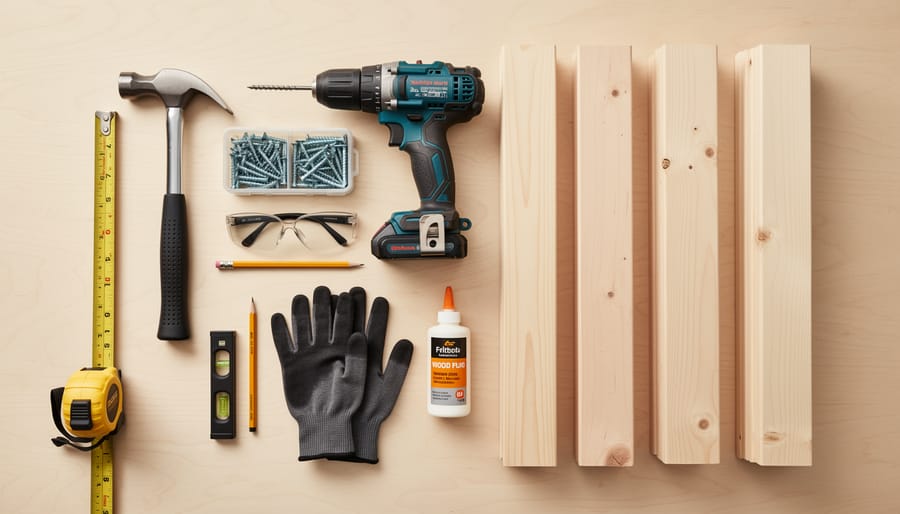
Getting your hands on the right supplies makes this project a breeze, and the good news is you probably own half of what you need already. For a standard 4-foot firewood rack that’ll hold about a quarter cord of wood, you’re looking at a trip to the hardware store and maybe an afternoon of gathering materials. Don’t stress about perfection here, firewood racks are forgiving projects, and a little character actually adds to the rustic appeal.
Materials You’ll Need:
- Eight 8-foot pressure-treated 2x4s (cut to size for posts, rails, and braces)
- Two pounds of 3-inch exterior wood screws
- Four 4-inch galvanized carriage bolts with washers and nuts (for securing corner posts)
- Optional: Wood stain or exterior sealant for weatherproofing
- Optional: Gravel or landscape fabric for the base area
Tools You’ll Need:
- Cordless drill with screwdriver and drill bits
- Circular saw or handsaw for cutting lumber
- Tape measure and carpenter’s pencil
- Level (a 2-foot level works perfectly)
- Square for checking right angles
- Safety glasses and work gloves
- Optional: Miter saw or power miter box for cleaner cuts
Now, let’s talk substitutions because nobody needs to blow their budget on firewood storage. If pressure-treated lumber feels pricey, cedar or redwood naturally resist rot and look gorgeous as they age to silvery grey. Tight on cash? Reclaimed barn wood or old fence boards bring wonderful texture and cost next to nothing, just check for protruding nails and give them a quick inspection for structural soundness. You can even build a perfectly functional rack using untreated pine if you commit to applying a solid coat of exterior sealant every couple years.
For hardware, don’t overthink it. Exterior screws beat nails because they hold better and won’t pop out when wood expands and contracts through seasons. If your drill has a dead battery, a manual screwdriver and some elbow grease will get you there, it’ll just take longer and you’ll feel it tomorrow.
Safety First: What to Watch Out For
Before you pick up that drill, let’s talk about keeping all your fingers intact. This is a straightforward project, but lumber and power tools deserve your respect, a little caution now beats a trip to urgent care later.
Start by setting up on level, stable ground. Wobbly footing leads to wobbly cuts, and nobody needs a saw blade dancing around unpredictably. Clear your workspace of trip hazards like garden hoses, stray branches, or that gardening apron you kicked off earlier. Speaking of gear, safety glasses aren’t optional, flying wood chips have terrible aim. Throw on work gloves to protect against splinters, especially if you’re working with pressure-treated lumber, which can irritate skin.
When handling power tools, keep both hands on the equipment and your attention fully present. Save the daydreaming for when you’re admiring the finished rack. If the weather turns wet, postpone the project. Damp conditions and electricity are a dangerous combination, plus wet wood is slippery and harder to cut cleanly.
Lift lumber with your legs, not your back, bend at the knees and keep the load close to your body. Those 2x4s might not look heavy, but awkward angles can tweak your back faster than you’d think. If a piece feels too unwieldy, ask for help or break the task into smaller sections.
Once you’re building, double-check that your drill bits are secure and your saw blade is sharp. Dull tools require more force, which means less control. Take breaks when you need them. Rushing through the final steps because you’re tired is exactly when accidents happen, and this project isn’t worth a preventable injury.
Building Your Rack: The Step-by-Step Process
Step 1: Cut Your Lumber to Size
Start by laying out all your lumber in a clear workspace where you can measure twice and cut once (or, let’s be honest, measure thrice and still hold your breath). For a standard 4-foot firewood rack, you’ll need these pieces from pressure-treated 2x4s:
– Four legs at 48 inches (these create your vertical posts)
– Two front rails at 48 inches (horizontal supports across the front)
– Two back rails at 48 inches (same for the back)
– Four side rails at 16 inches (connect front to back on each side)
– Two diagonal braces at 20 inches (cut at 45-degree angles on each end for stability)
Mark each cut clearly with a pencil and carpenter’s square. If you’re using a hand saw, take your time and follow the line. A miter saw makes quick work of straight cuts, but either tool will do the job. Stack cut pieces by type so assembly goes smoothly.
Step 2: Build the Base Frame
Lay your four base pieces on flat ground in a rectangle, two long sides and two short ends. Before you reach for the drill, grab your speed square or measuring tape and check that the corners form perfect 90-degree angles. A wonky base now means a wobbly rack later, and nobody wants their firewood avalanche to become neighborhood entertainment.
Drive two or three 3-inch deck screws through the long pieces into the ends of the short pieces at each corner. Pre-drilling pilot holes prevents splitting, especially if you’re working with thinner lumber. For extra strength on a rack that’ll hold a full winter’s worth of logs, add metal corner brackets on the inside joints. Give the assembled frame a shake, it should feel solid, not rickety. If it wobbles, tighten those screws until everything stays put. This rectangle is your foundation, so take an extra minute to get it right.
Step 3: Attach the Vertical Support Posts
With your base frame squared up and sturdy, it’s time to give your rack some height. Cut four corner posts to about 36 inches, this works well for stacking two to three rows of standard 16-inch firewood. Position one post at each corner of your base frame, setting them vertically on the inside edges.
Here’s where your level becomes your best friend. Hold each post plumb (perfectly vertical) against the frame while a helper drives three-inch screws through the base into the post bottom. Check with the level on two adjacent sides of each post before fastening completely. Even a slight lean now becomes a wobbly rack later.
For racks longer than four feet, add a middle support post on each long side, spaced evenly between corners. These prevent sagging when you load up heavy oak or maple. Stand back and admire your emerging structure, it’s starting to look like something that could actually hold firewood instead of collapsing dramatically in front of your neighbor’s judgmental gaze.
Step 4: Add Horizontal Rails and Side Braces
Now comes the fun part where your firewood rack stops looking like a wobbly skeleton and starts feeling like furniture that won’t collapse under a winter’s worth of logs.
Start by attaching horizontal rails between your vertical posts. Position one rail about 6 inches from the ground on the front posts, this creates the bottom lip that keeps logs from rolling out like escaped prisoners. Add a matching rail on the back posts at the same height. Secure each connection with two 3-inch deck screws driven at slight angles for extra grip. For taller racks, add a middle rail about halfway up to prevent firewood from bulging outward.
The diagonal side braces transform everything. Cut two 2x4s at 45-degree angles to run from the bottom front corner to the top back corner on each end. These aren’t decorative, they’re what keeps your loaded rack from doing the limbo when you bump it. Screw them securely to both the base frame and the top of the posts. Give the structure a good shake. If it wiggles, add more screws. A properly braced rack shouldn’t budge even when you lean against it.
Step 5: Finishing Touches and Weatherproofing
Your rack is structurally sound, but a few finishing touches will extend its lifespan and make it look intentional rather than slapped together. Start by sanding any rough edges or splinters, future-you will thank you when grabbing wood in the dark. A quick pass with 120-grit sandpaper takes five minutes and saves a lot of swearing.
If you used untreated lumber, now’s the time for weatherproofing. A coat of exterior wood sealer or stain protects against moisture and UV damage. Cedar naturally resists rot, but even it benefits from a sealant. Let it dry completely before stacking wood, usually 24 hours.
Consider a gravel base underneath if your rack sits directly on soil. A three-inch layer improves drainage and prevents the bottom from sitting in puddles after rain. Landscape fabric beneath the gravel stops weeds from invading your firewood fortress.
Want to get fancy? Add a sloped roof piece using leftover plywood and shingles. It keeps snow and rain off your top layer, which means drier kindling when you need it most. Just angle it enough for runoff, you’re not building the Sistine Chapel here.
These extras aren’t mandatory, but they transform a functional rack into a handsome garden feature you’ll actually enjoy looking at.
Testing Your Rack and What Comes Next
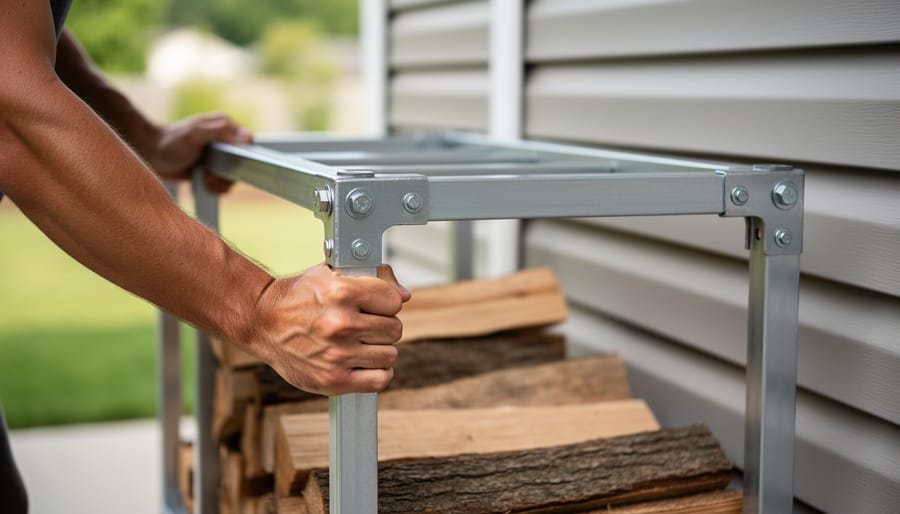
Before you start tossing logs onto your shiny new creation, give it a proper shakedown test. Grab the corners and give the rack a gentle wiggle, it should feel solid, not like a wobbly shopping cart. Walk around and double-check that every screw is snug (power drills sometimes skip the final tightening twist). Press down on the top rails to make sure nothing flexes alarmingly. Then load just three or four logs onto one side and step back. Does the rack lean or shift? If everything stays put, congratulations, your structure passes inspection.
Now for the fun part: stacking your firewood properly makes all the difference between a tidy setup and a log avalanche waiting to happen. Start with your largest, straightest pieces on the bottom to create a stable foundation.
Crisscross the ends if you have the space, it locks everything together like a wooden jigsaw puzzle.
Position your finished rack somewhere sensible: close enough to the back door that you won’t curse the rain when fetching logs, but at least a few feet away from the house (termites have terrible boundaries). Choose level ground with decent drainage, nobody wants their rack slowly sinking into a mud pit. Once a year, give your creation a quick health check. Tighten any loose hardware, look for signs of rot in the lumber, and make sure the structure still sits level. Then stand back, admire what your hands built, and look forward to cozy fires all season long.
Creative Variations to Match Your Garden Style
Your firewood rack doesn’t have to look like everyone else’s utilitarian lumber box. Think of it as garden furniture that happens to hold logs.
For a cottage garden style paint your rack white or soft sage and add decorative corner brackets from the hardware store. A sloped roof made from corrugated metal or cedar shingles keeps rain off and looks intentional, not cobbled together. If you’re tight on space, flip the design vertical, stack compartments three high instead of spreading wide.
Rustic lovers can swap standard posts for thick log rounds or branches with the bark still on. Old fence boards, weathered barn wood, or reclaimed pallets add instant character and cost nothing if you’re resourceful. Just check that salvaged materials are sturdy enough for the weight.
Build a three-sided version against your shed or fence to save on lumber and create a tidy corner spot. Paint the visible side to match your house trim, or leave it natural and let it silver with age. You can even repurpose leftover garden stakes as decorative side slats for ventilation.
The beauty of DIY is making it yours. Whether you lean modern minimalist or shabby chic, your firewood rack can complement your outdoor space instead of hiding behind the garage.
Common Questions About DIY Firewood Racks
How much firewood does a 4-foot rack actually hold?
A standard 4-foot rack with 4-foot height typically stores about half a face cord, which translates to roughly 128 cubic feet of stacked firewood. That’s enough to keep most households cozy through several winter weekends. If you’re heating primarily with wood, you’ll want to build multiples or go with a longer design.
Should my rack have a bottom or can it sit directly on the ground?
Skip the bottom boards and let your rack sit on bare ground or gravel. This allows air to circulate underneath and lets rain drain away instead of pooling. A few inches of gravel or paver stones underneath keeps the lowest logs from sitting in mud and prevents the rack itself from sinking. Think of it as giving your firewood breathing room from below.
What wood should I use to build the rack itself?
Pressure-treated lumber wins for longevity and weather resistance, lasting 15-20 years outdoors. Cedar comes in second with natural rot resistance and a prettier appearance, though it costs more. Plain pine or spruce works if you seal it well, but expect to replace it in 5-7 years. Whatever you choose, avoid using it for kindling later since treated wood releases nasty chemicals when burned.
How do I stop my rack from sinking into soft soil?
Can I build this without power tools?
Absolutely, though it takes longer. A handsaw, screwdriver, and hand drill work fine, people built firewood racks for centuries without electricity. Pre-cut lumber from the hardware store saves significant elbow grease.
Do I really need a roof on my rack?
Not essential, but helpful. A simple sloped roof keeps rain and snow off the top layer, speeding up drying time. Even a tarp bungeed across the top works in a pinch.
How long will my treated wood rack last outdoors?
Expect 15-20 years from pressure-treated construction with minimal maintenance. Annual hardware checks and keeping the rack off soggy ground extend its life even further.
Set your rack on concrete pavers, flat stones, or a 4-inch gravel bed to distribute weight. This creates a stable foundation that won’t shift when you load 300 pounds of oak onto it. For really swampy areas, pour small concrete footings under each corner post, overkill for most yards, but it solves persistent sinking problems. The same foundation principles apply whether you’re building a firewood rack or an outdoor storage bench so the techniques transfer nicely between projects.
Congratulations! You’ve just built something that’ll serve you for years, keep your firewood dry and ready, and look pretty darn good doing it. That tidy stack of logs is now a badge of honor in your yard, not a soggy mess by the shed. Your back will thank you, your fireplace will thank you, and honestly, your neighbors are probably already wondering where you bought such a nice rack. (Feel free to gloat a little when you tell them you made it yourself.)
This is exactly what gardening and outdoor DIY is all about: creating practical solutions with your own hands while making your space more beautiful and functional. Now go ahead and load up that rack, step back, admire your work, and maybe start dreaming about your next weekend project. Your garden has plenty more possibilities waiting.
